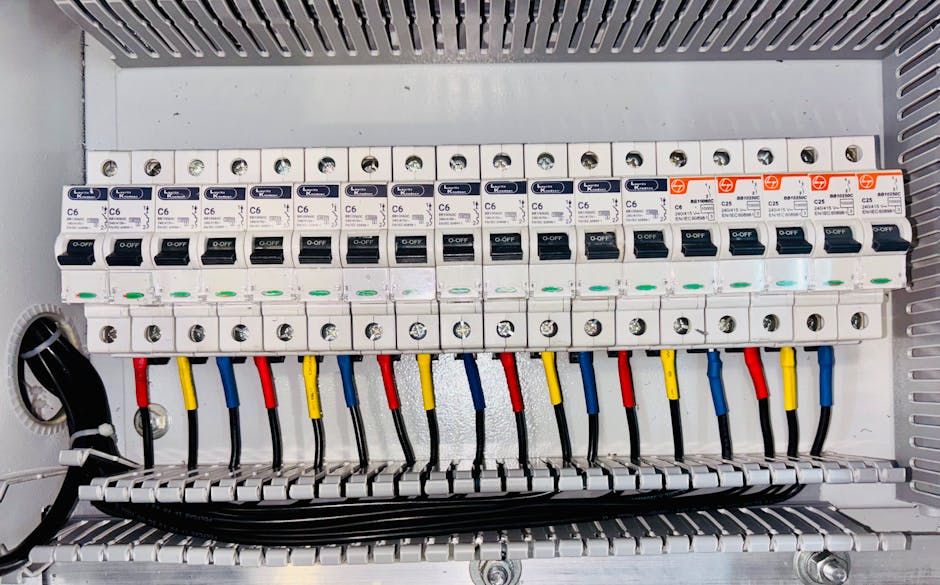
A 240V dryer circuit typically requires a 30–50 amp breaker depending on dryer specifications, 10 or 8 AWG copper wire, and a dedicated circuit. NEC code mandates proper grounding, appropriate outlet type, and breaker sizing based on the appliance’s nameplate amperage rating.
240V Dryer Circuit Basics and NEC Requirements
Installing a 240-volt dryer circuit is one of the most common electrical projects homeowners and contractors encounter. The National Electrical Code (NEC) provides strict guidelines to ensure safe operation and prevent electrical hazards. Understanding these requirements before you begin is essential for a code-compliant installation.
Every electric dryer operates on a 240-volt supply, which is split between two hot legs of your home’s main panel. This dual-voltage configuration delivers approximately twice the power of a standard 120V circuit, making it suitable for the heating elements that dry clothes efficiently.
What size breaker do I need for a 240V electric dryer?
Breaker sizing for your dryer circuit depends entirely on the nameplate amperage rating of your specific appliance. Most residential electric dryers fall into one of three categories:
- 30-amp breaker: Older or smaller dryers, typically drawing 24–30 amps
- 40-amp breaker: Mid-range residential dryers, drawing 30–40 amps
- 50-amp breaker: High-capacity or commercial-grade dryers, drawing 40–50 amps
According to OSHA electrical safety standards, the breaker amperage must never exceed the wire ampacity. This means you cannot install a 50-amp breaker on a circuit wired with 10 AWG copper conductor. The breaker protects the wire from overheating, so undersized wire with oversized breaker protection is a serious fire hazard.
Wire Gauge and Breaker Size Calculations
Selecting the correct wire gauge is non-negotiable for dryer circuits. Wire ampacity tables in the NEC establish the maximum current a conductor can safely handle without excessive heat buildup.
How do I calculate wire gauge for a dryer circuit?
Wire gauge selection follows this straightforward methodology:
- Find the dryer’s nameplate amperage – Located on the appliance or in the manual
- Consult NEC Table 310.16 – References ampacity for copper conductors at 60°C, 75°C, or 90°C insulation ratings
- Select wire one size larger – This safety margin prevents nuisance tripping and accommodates minor voltage drops over distance
- Match the breaker to the wire – Never exceed wire ampacity when setting breaker amperage
Standard combinations for residential dryer circuits are:
| Dryer Amperage | Wire Gauge (Copper) | Breaker Size |
|---|---|---|
| 24–30 amps | 10 AWG | 30 amp |
| 30–40 amps | 8 AWG | 40 amp |
| 40–50 amps | 6 AWG | 50 amp |
The NEC specifies that circuit conductors must be grounded with an equipment grounding conductor (green or bare copper). For 240-volt dryer circuits, this grounding wire must match the wire gauge of your hot conductors. Always use a separate equipment ground unless your installation predates 1996 (when bonding rules changed).
Step-by-Step Installation Guide
A proper 240V dryer circuit installation involves five critical steps:
Step 1: Turn Off Power and Locate the Panel
Shut off the main breaker and verify power is off using a multimeter. Identify the location in your service panel where the new circuit will connect.
Step 2: Run Conduit and Wire
Install appropriate conduit (typically 3/4-inch EMT for 8 AWG or larger) from the panel to the dryer location. Pull your sized conductors through the conduit. All wiring must be protected and accessible during installation.
Step 3: Install the Breaker
Insert the correctly sized tandem or double-pole breaker into an available slot in your panel. Ensure the breaker matches both your wire gauge and the dryer’s nameplate amperage rating.
Step 4: Connect to the Dryer Outlet
At the dryer location, terminate wires in a NEMA 14-30R or NEMA 14-50R outlet (depending on amperage). Verify the outlet matches your breaker size. The red and black conductors connect to the brass terminals, the white neutral to silver, and green ground to green.
Step 5: Test and Verify**
Before plugging in the dryer, use a multimeter to confirm 240 volts between hot conductors and proper continuity of all connections. Test the outlet’s ground-fault protection if equipped.
Common Mistakes and Safety Considerations
Several installation errors can compromise safety or fail inspection:
- Mismatched breaker and wire: A 50-amp breaker on 10 AWG wire is dangerous. The breaker won’t trip before the wire overheats.
- Wrong outlet type: NEMA 10-30R (older, ungrounded outlets) no longer meet NEC code for new installations. Always use NEMA 14-30R or 14-50R.
- Improper grounding: Missing or undersized equipment grounds create shock hazards and prevent proper fault clearing.
- Inadequate conduit protection: Unprotected wire is vulnerable to damage, creating fire and shock risks.
Always verify your local electrical code before beginning work. Some jurisdictions require permits and inspection for dryer circuit installations. When in doubt, consult a licensed electrician.
Related: 240V dryer circuit installation
Related: solar panel system calculator
Related: 3 phase voltage drop chart
Related: LED vs incandescent watt comparison
Related: wet location outlet standards
Related: GFCI and AFCI outlet requirements
Related: EV home charging cost breakdown
Related: power factor and electrical costs
How to Use the Calculator
To streamline your planning process, use the wire ampacity calculator to confirm wire gauge selection based on conductor material, insulation type, and ambient temperature. This tool helps eliminate guesswork and ensures your calculations align with NEC standards. You can also reference our
- 240V Dryer Circuit Breaker Kit — Essential component for proper 240V dryer installation; directly addresses the 30-50 amp breaker requirement mentioned in the post
- 10 AWG and 8 AWG Copper Wire Spool — Core material specified in the post for 240V dryer circuits; homeowners need the correct gauge wire for safe installation
- 240V Dryer Outlet and Plug Assembly Kit — Completes the circuit installation with proper outlet type meeting NEC code requirements; essential for safe connection
See also: How to Wire a 3-Way Switch: Complete Installation Guide
See also: EV Home Charging: Level 1 vs Level 2 Cost Breakdown
See also: EV Home Charging: Level 1 vs Level 2 Cost Breakdown
Related: Refrigerator Dedicated Circuit Code: 5 Essential Requirements for 2026
Related: 7 Essential Steps to Size Furnace Electrical Connections Correctly in 2026
Related: 5 Essential Steps for Attic Outlet Installation in 2026
Related: Complete 240V Dryer Circuit Installation Guide for 2026
Related: Complete 240V Dryer Circuit Installation Guide 2026
SPONSORED
Estimating Software Built for Electrical Contractors
ArcSite lets you draw site plans, create estimates, and close jobs faster — all from your phone or tablet. Used by 100,000+ field service professionals.
Try ArcSite Free →Affiliate partner — we may earn a commission at no cost to you.