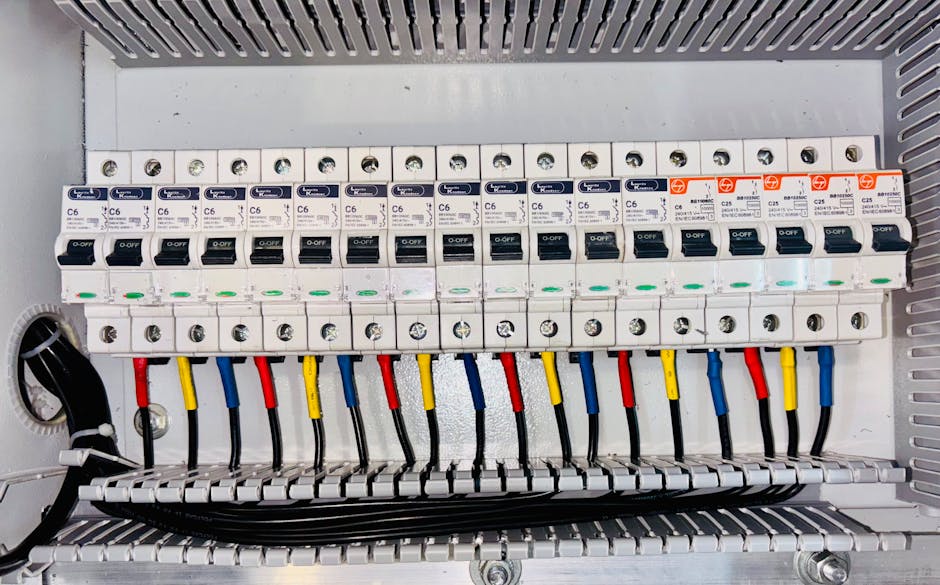
A 240V dryer circuit requires a 30-50 amp breaker depending on dryer wattage, 10 or 8 AWG copper wire, and a dedicated circuit per NEC code. Most household electric dryers need 240V, 40-50 amps, with proper grounding and disconnect means. (Related: Washington State L&I Electrical Safety Standard Updates and NEC Code Compliance) (Related: Conduit Fill Calculator: Size Conduit the Right Way) (Related: Ohm’s Law Calculator: The Complete Guide to Voltage, Current, and Resistance) (Related: Commercial electrical service requirements and NEC code compliance for business installations in Pacific Northwest) (Related: Complete Guide to Three-Phase Power Residential Installation in 2026) (Related: Dimmer Switch Installation Load Limits: The Complete 2026 Guide)
240V Dryer Circuit Basics and NEC Requirements
Electric dryers are among the highest-demand appliances in any home. Unlike standard 120V outlets, a dryer circuit must supply two separate 120V legs simultaneously, combining to deliver the 240V needed for heating elements that typically draw 4,000–6,000 watts. Understanding the National Electrical Code (NEC) framework before you touch a single wire is essential for both safety and code compliance.
Under NEC Article 220 and Section 422.10, electric dryers must be served by a dedicated branch circuit — meaning no other appliance or outlet shares that circuit. This protects against nuisance tripping and reduces fire risk from overloaded conductors. According to OSHA’s electrical safety guidelines, improper wiring of high-voltage appliance circuits is a leading contributor to electrical fires and arc flash incidents in residential settings.
Modern NEC editions also require a 4-wire connection for new dryer outlet installation: two hot conductors, one neutral, and one separate equipment ground. Older 3-wire installations (using the neutral as ground) are grandfathered in some jurisdictions, but any new rough-in work must follow the 4-wire standard. Always verify requirements with your local authority having jurisdiction (AHJ) before beginning any dryer outlet installation.
Breaker Size Selection for Electric Dryers
What size breaker do I need for a 240V electric dryer?
Most standard residential electric dryers require a 30-amp double-pole breaker. However, larger or high-efficiency dryers — particularly those with steam functions or combined washer-dryer units — may specify a 40 or 50-amp breaker. Always check your dryer’s nameplate data plate, which lists the minimum circuit ampacity and maximum overcurrent protection device rating.
Here’s a quick reference for dryer breaker size by appliance wattage:
- 5,000W or less: 30-amp breaker, 10 AWG wire
- 5,001W – 8,000W: 40-amp breaker, 8 AWG wire
- 8,001W – 10,000W: 50-amp breaker, 6 AWG wire
Per NEC Section 220.54, the demand factor for household dryers is calculated at 5,000W or the nameplate rating (whichever is larger) for the first four dryers, with adjustments for larger installations. For a single dryer in a residence, the calculation is straightforward: use the nameplate wattage divided by voltage (240V) to get amperage, then size the breaker at 125% of that continuous load.
Use our circuit breaker size calculator to run the numbers for your specific dryer model before purchasing breaker hardware.
Wire Gauge and Cable Requirements
What gauge wire is required for a dryer circuit?
The correct 240V wiring gauge depends directly on your breaker size and circuit ampacity. NEC Table 310.16 governs conductor ampacity for copper wire at standard 60°C and 75°C temperature ratings:
- 10 AWG copper: Rated for 30 amps — standard for most residential dryers
- 8 AWG copper: Rated for 40 amps — required for larger dryer circuits
- 6 AWG copper: Rated for 55 amps — used for 50-amp high-demand circuits
For new dryer circuit installation, use 10/3 or 8/3 NM-B cable (commonly called Romex), which contains two hot conductors, one neutral, and one bare copper ground wire in a single sheathed cable. If running wire through conduit — required in exposed locations like garages or unfinished basements — use individual THHN conductors of the appropriate gauge.
Never use aluminum wire for residential dryer circuits without verifying your terminations are rated for aluminum. Most residential breakers and outlets are only rated for copper, and improper aluminum connections are a documented fire hazard. When in doubt, stick with copper throughout.
Also confirm that your wire run length doesn’t create a voltage drop problem. Runs exceeding 50 feet may require upsizing the conductor one AWG to maintain efficiency. Our voltage drop calculator can help you determine whether your run distance requires a conductor upgrade.
Step-by-Step Installation Guide
Before starting, turn off the main breaker and verify the panel is de-energized with a non-contact voltage tester. Never work on a live panel.
- Plan your route: Determine the most direct cable path from the panel to the dryer location, minimizing bends and penetrations through fire-rated assemblies.
- Run the cable: Feed 10/3 or 8/3 NM-B cable from the panel to the outlet box, securing it every 4.5 feet and within 12 inches of each box per NEC 334.30.
- Install the outlet box: Mount a 4-inch square or single-gang box rated for the NEMA 14-30R or 14-50R receptacle you’re installing.
- Wire the receptacle: Connect the two hot conductors to the brass terminals, the neutral to the silver terminal, and the ground to the green screw. Torque terminals to manufacturer specifications.
- Install the breaker: At the panel, connect the two hot leads to a double-pole breaker of the correct amperage rating. Connect neutral to the neutral bar and ground to the ground bar separately.
- Test the circuit: Restore power, verify correct voltage between legs (should read 240V) and between each leg and neutral (should read 120V each) using a multimeter.
Common Mistakes and Safety Considerations
These are the most frequent errors seen during dryer circuit installation — each capable of causing equipment damage, shock hazard, or fire:
- Using 3-wire connections on new installations: NEC now requires 4-wire for all new dryer circuits. A missing dedicated ground is a serious safety failure.
- Undersizing the breaker: A 20-amp breaker will trip constantly and may be overloaded before it trips. Always match the breaker to the dryer’s nameplate requirements.
- Wrong outlet type: NEMA 10-30 is the old 3-prong dryer outlet. Current code requires NEMA 14-30 (4-wire, 30A) or 14-50 (4-wire, 50A) for new installations.
- Skipping the permit: Most jurisdictions require a permit for new circuit installation. An uninspected circuit can create issues when selling your home and may void homeowner’s insurance claims.
- Not torquing connections: Loose connections cause arcing and
See also: Wire Gauge Calculator: The Complete Guide to Choosing the Right Wire Size
See also: 2026 Complete Guide to Laundry Room Electrical Circuits
Recommended Resources:- Siemens 200 Amp Main Breaker Panel — Essential for 240V dryer circuit installation; readers need proper breaker panels to accommodate dedicated 30-50 amp breakers
- Southwire 8/3 AWG Copper Wire (50 ft) — Directly matches the 8-10 AWG copper wire requirement specified in the guide for 240V dryer circuits
- Leviton 240V 50 Amp Dryer Outlet — Critical component for completing a 240V dryer installation; provides proper connection point for 40-50 amp circuits
Related: Attic Outlet Installation: The Complete 2026 Guide to Running Circuits in Limited Space
Related: Complete 240V Dryer Circuit Installation Guide for 2026
SPONSORED
Estimating Software Built for Electrical Contractors
ArcSite lets you draw site plans, create estimates, and close jobs faster — all from your phone or tablet. Used by 100,000+ field service professionals.
Try ArcSite Free →Affiliate partner — we may earn a commission at no cost to you.
Advertisement